

إنشاء نطاق فرعي
أضف نطاقًا فرعيًا مثل blog.example.com في cPanel، واختر إن كان يقدّم مجلده الخاص أم يشارك موقعك الرئيسي.
أضف نطاقًا فرعيًا مثل blog.example.com أو staging.example.com. ينطبق على
الاستضافة المشتركة والموزِّعة والمميّزة.
أنشئه
-
في cPanel، افتح Domains ضمن Domains.
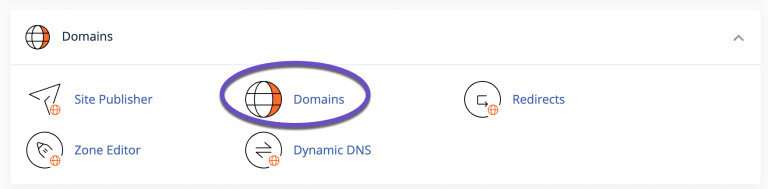
-
اختر Create A New Domain.
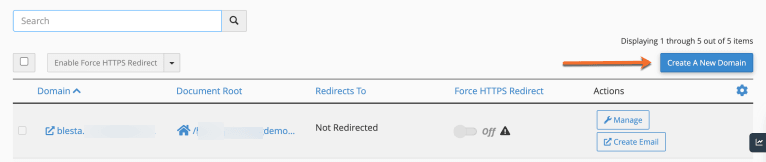
-
أدخل النطاق الفرعي كاملًا في Domain، مثل
blog.example.com. -
أزل تعليم Share document root with example.com.
-
اضبط المجلد الذي يقدّم منه النطاق الفرعي — ويُنشأ
blogلك تحت مجلدك الرئيسي افتراضيًا. -
اختر Submit.
الخطوة الرابعة هي المهمة. فتركها معلَّمة يوجّه النطاق الفرعي إلى موقعك
الرئيسي، فيقدّم blog.example.com وexample.com المحتوى نفسه من الملفات
نفسها. وذلك ما تريده أحيانًا؛ لكنه ليس المعتاد، وفكّه لاحقًا مربك.
تأكّد أنه نجح
curl -sI https://blog.example.com | head -n 1فرمز 200 أو 403 (مجلد فارغ) يعني أن DNS وخادم الويب كليهما يعملان. أما
Could not resolve host فتعني أن DNS لم ينتشر بعد — اسمح ببضع دقائق.
ونطاقك الفرعي مغطّى بـ AutoSSL تلقائيًا، وإن كانت الشهادة قد تستغرق دقائق للإصدار. راجع تثبيت شهادة SSL مجانية.
إدارته أو إزالته
كل النطاقات الفرعية مدرَجة ضمن cPanel ← Domains، حيث يمكنك تغيير الجذر المستنَدي أو إزالتها.
وإزالة نطاق فرعي لا تحذف ملفاته — فهي تبقى في المجلد، وعليك إزالتها منفصلةً إن لم تعد تريدها.
اقرأ أيضًا
هل أستطيع تشغيل ماجنتو على الاستضافة المشتركة؟
يُثبَّت ماجنتو على الاستضافة المشتركة والموزِّعة لكنه غير موصى به. ما يحتاجه، وأي باقات WebGee مناسبة.
الملفات التي تحذفها WebGee تلقائيًا
تحذف WebGee دوريًا النسخ الاحتياطية والأرشيفات والبريد غير المرغوب القديم من حسابات الاستضافة لاستعادة مساحة القرص. ماذا يُزال، وكيف تحتفظ بما يهمّ.