

إضافة موقع
أنشئ موقع ووردبريس إنتاجي أو تجريبي من لوحة ووردبريس كلاود، مع قواعد النطاقات وما يجهّزه المثبّت نيابةً عنك.
عند إضافة موقع تُنشأ حاوية ويُثبَّت ووردبريس وتُصدر شهادة SSL وتُنشأ قاعدة بيانات — عادةً في أقل من دقيقة. ينطبق على جميع باقات ووردبريس كلاود.
اذهب إلى المواقع ← إضافة موقع، أو استخدم زر إضافة موقع في الصفحة الرئيسية.
اختر بين الإنتاجي والتجريبي
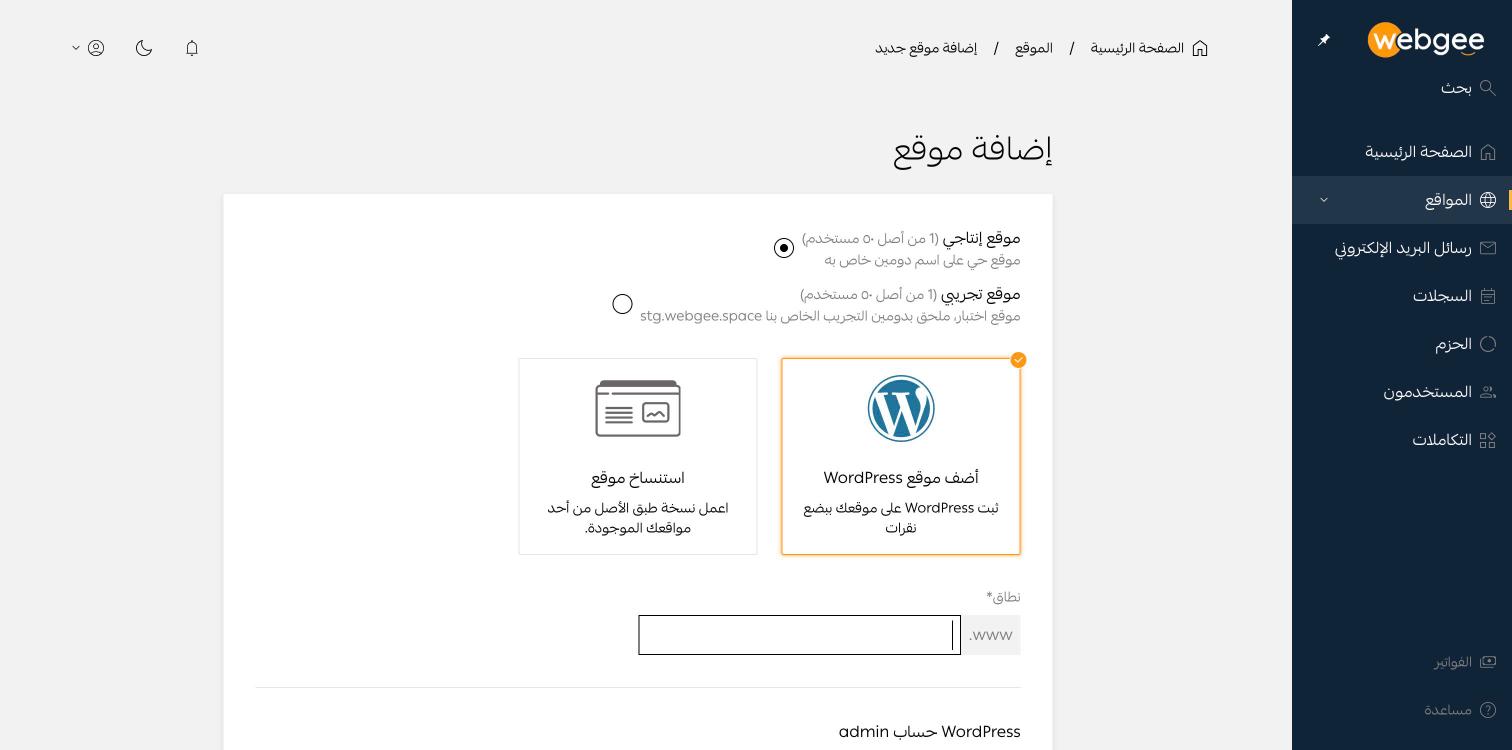
موقع إنتاجي — موقع حي على اسم نطاق خاص به. تُدخل النطاق وتضيف اللوحة بادئة
www.
موقع تجريبي — موقع اختبار على نطاق WebGee التجريبي. تُدخل الاسم فقط وتُلحق
اللوحة stg.webgee.space.
يُحتسب الموقعان الإنتاجي والتجريبي بشكل منفصل من باقتك، فالموقع التجريبي لا يستهلك حصة موقع إنتاجي. راجع الباقات والحدود.
يجب أن يكون النطاق الإنتاجي مملوكًا لمؤسستك مسبقًا. وإن لم يكن كذلك ترفض اللوحة العملية برسالة Unable to create website outside of the org ولا يُنشأ شيء. أضف النطاق إلى مؤسستك أولًا ثم أنشئ الموقع.
اختر ما تريد تثبيته
أضف موقع WordPress يثبّت نسخة جديدة من ووردبريس.
استنساخ موقع ينسخ موقعًا قائمًا. ويظل معطّلًا حتى يصبح لديك موقع واحد على الأقل لتنسخ منه، فهو غير متاح عند إنشاء موقعك الأول.
املأ بيانات حساب مدير ووردبريس
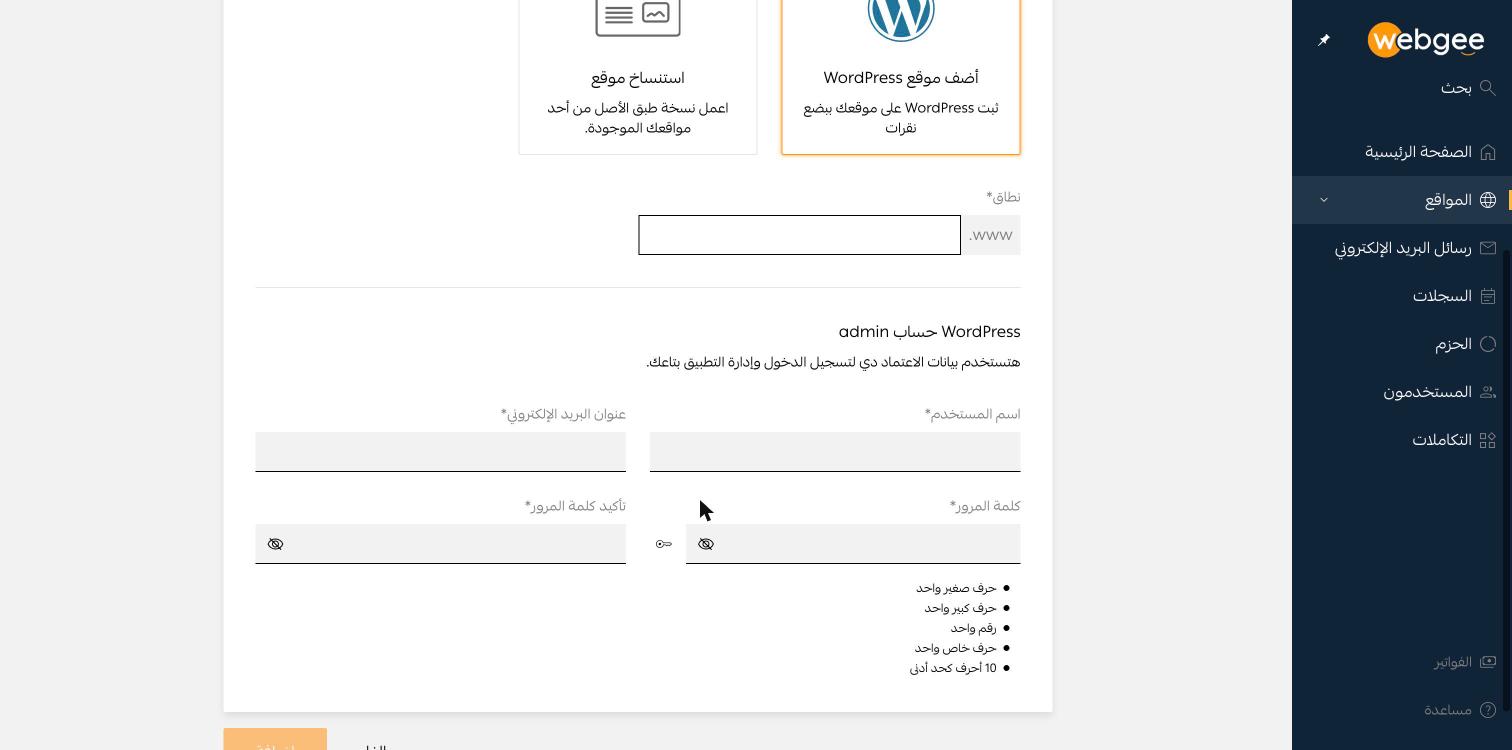
تصبح هذه بيانات مدير ووردبريس، لا بيانات دخولك إلى اللوحة.
- اسم المستخدم وعنوان البريد الإلكتروني — يُستخدمان لحساب ووردبريس.
- كلمة المرور — يجب أن تحتوي حرفًا صغيرًا وحرفًا كبيرًا ورقمًا ورمزًا خاصًا، وألا تقل عن 10 أحرف. أيقونة المفتاح بين حقلي كلمة المرور تولّد كلمة تستوفي هذه الشروط، وأيقونة العين تُظهر ما وُلِّد لتسجّله.
سجّل كلمة المرور قبل الإرسال، فاللوحة لا تعرضها مرة أخرى. ونادرًا ما ستحتاجها،
إذ يتيح تسجيل الدخول الموحّد الدخول إلى
wp-admin بدونها.
أنشئ الموقع
اضغط إضافة. تعرض اللوحة تقدّمًا مباشرًا أثناء تنزيل ووردبريس وتثبيته.
ما الذي تحصل عليه
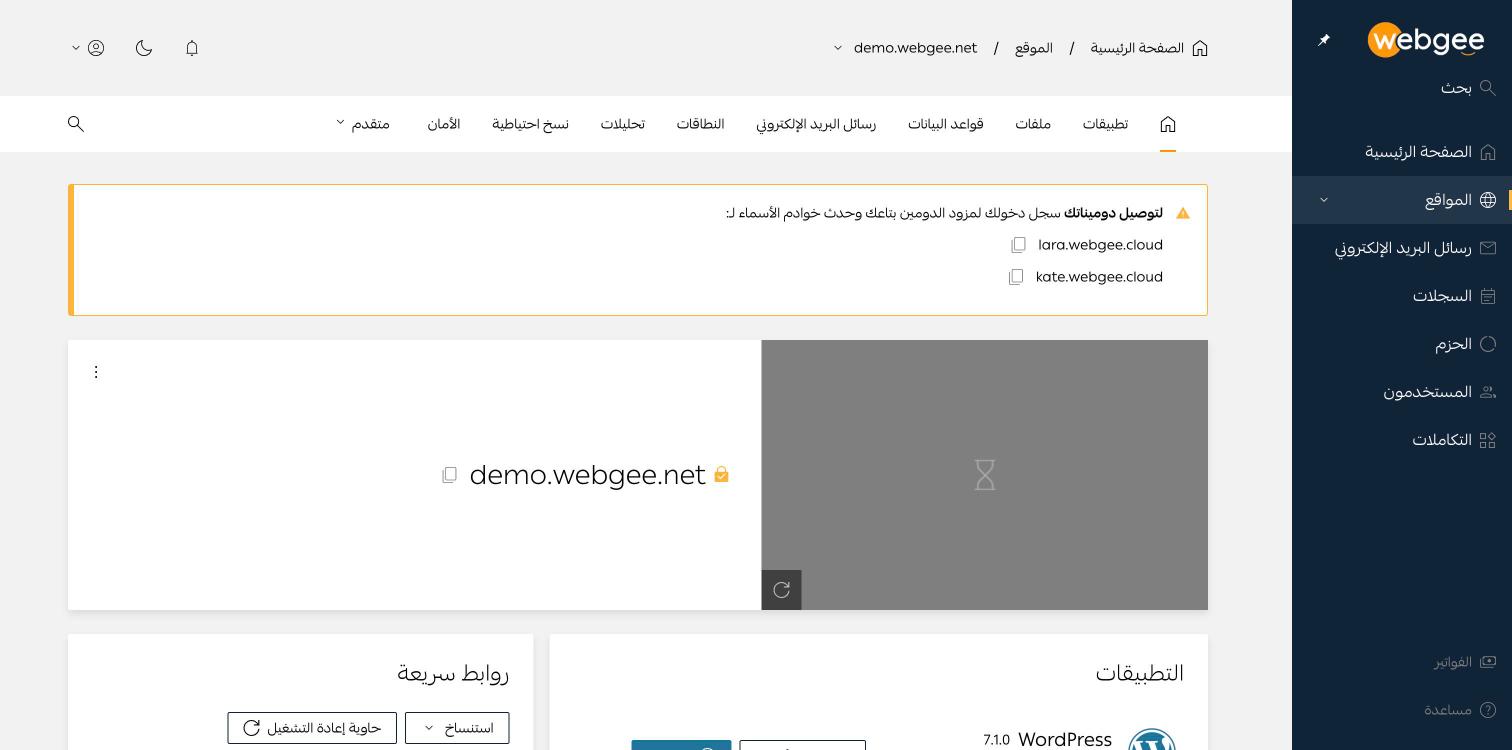
تعرض صفحة الموقع التطبيق المثبَّت والروابط السريعة ولوحة نظرة سريعة.
يبدأ الموقع الإنتاجي بلافتة تخبرك بخوادم الأسماء التي يجب ضبطها لدى مسجّل
النطاق — lara.webgee.cloud وkate.webgee.cloud. وإلى أن تفعل ذلك يبقى الموقع
موجودًا دون أن يصل إليه أي زائر. المواقع التجريبية لا تحتاج هذه الخطوة لأنها
تعمل على نطاق WebGee نفسه.
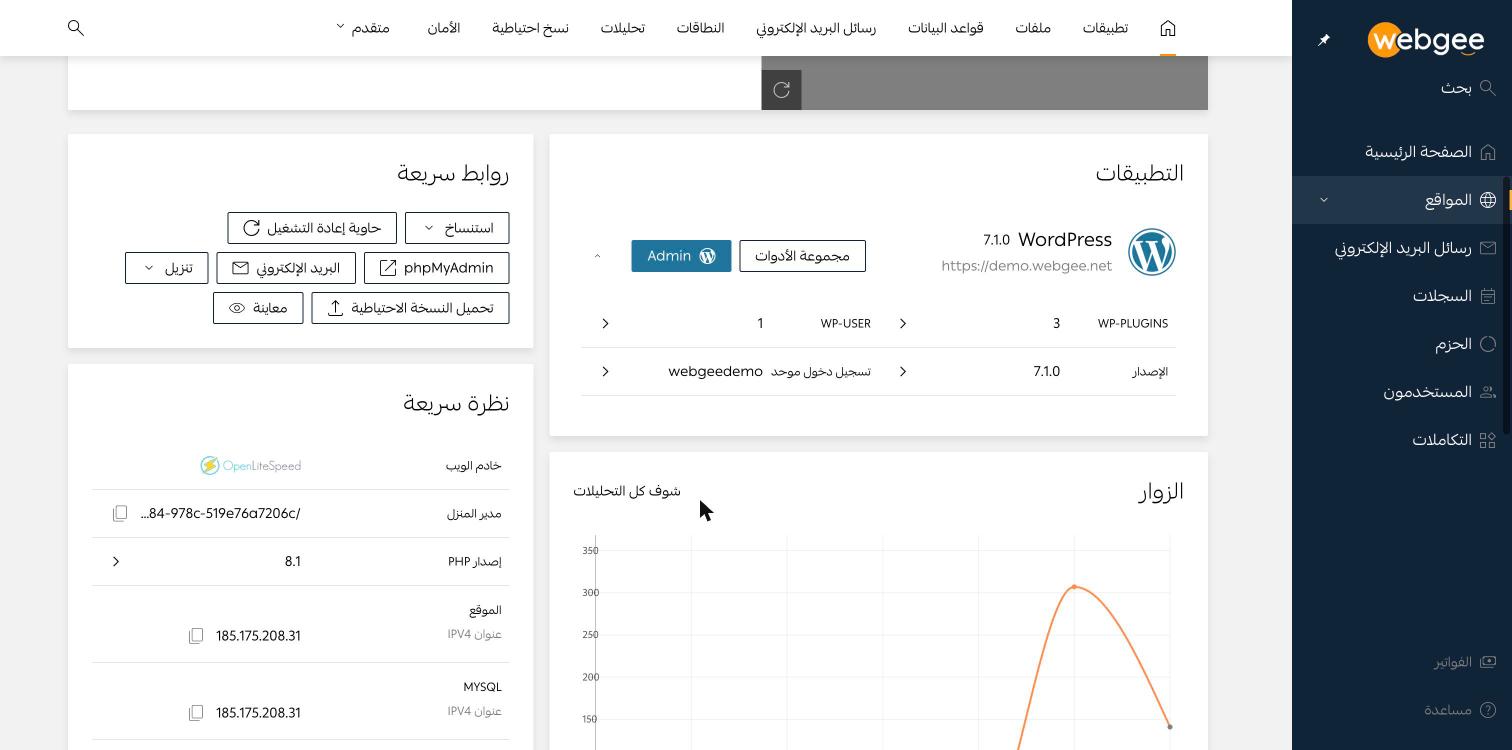
| الحقل | المعنى |
|---|---|
| خادم الويب | OpenLiteSpeed |
| المجلد الرئيسي | مسار الحاوية، /var/www/ متبوعًا بمعرّف الموقع |
| إصدار PHP | الإصدار الذي يعمل عليه الموقع — انظر أدناه |
| عناوين IPv4 | العناوين التي تشير إليها سجلات DNS |
| تاريخ الإنشاء | وقت التجهيز |
تُجهَّز المواقع الجديدة على PHP 8.1، وهو إصدار انتهى دعمه. ارفعه إلى إصدار مدعوم من متقدم ← أدوات المطور ما لم يكن قالبك أو إضافاتك تتطلب 8.1. راجع إصدارات PHP وإعداداته.
تحقّق
- يُفتح الموقع عبر
https://. - يعرض تبويب تطبيقات ووردبريس مع رقم إصداره.
- تبويب نسخ احتياطية فارغ، وهذا متوقع. خذ نسختك الاحتياطية الأولى قبل البدء في البناء.