

Enable Redis object caching
Turn on Redis in cPanel and point LiteSpeed Cache at it, so WordPress stops repeating the same database queries on every page load.
Turn on Redis object caching for a WordPress site running LiteSpeed Cache. Applies to shared and reseller hosting.
Object caching keeps the results of database queries in memory, so WordPress stops asking the database the same questions on every page load. It makes the biggest difference on sites with a lot of plugins, a large product catalogue, or a slow admin area.
Memcached is no longer available. The extension was deprecated and disabled across the platform, so Redis is the supported option — see Memcached vs Redis.
1. Enable Redis in cPanel
-
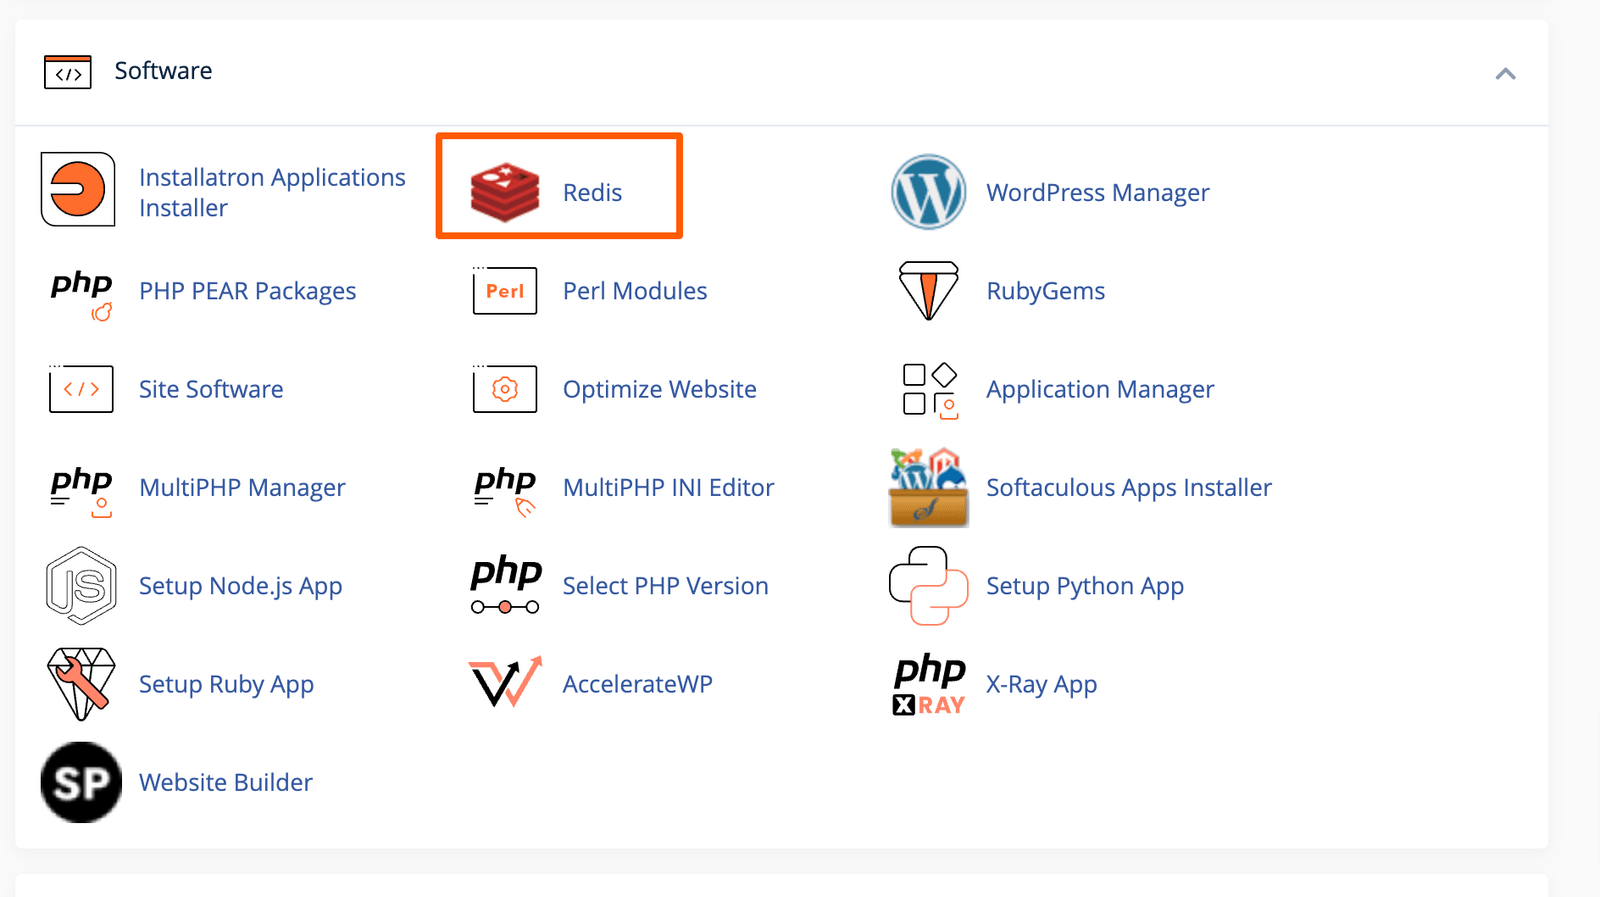
In cPanel, open Redis.
-
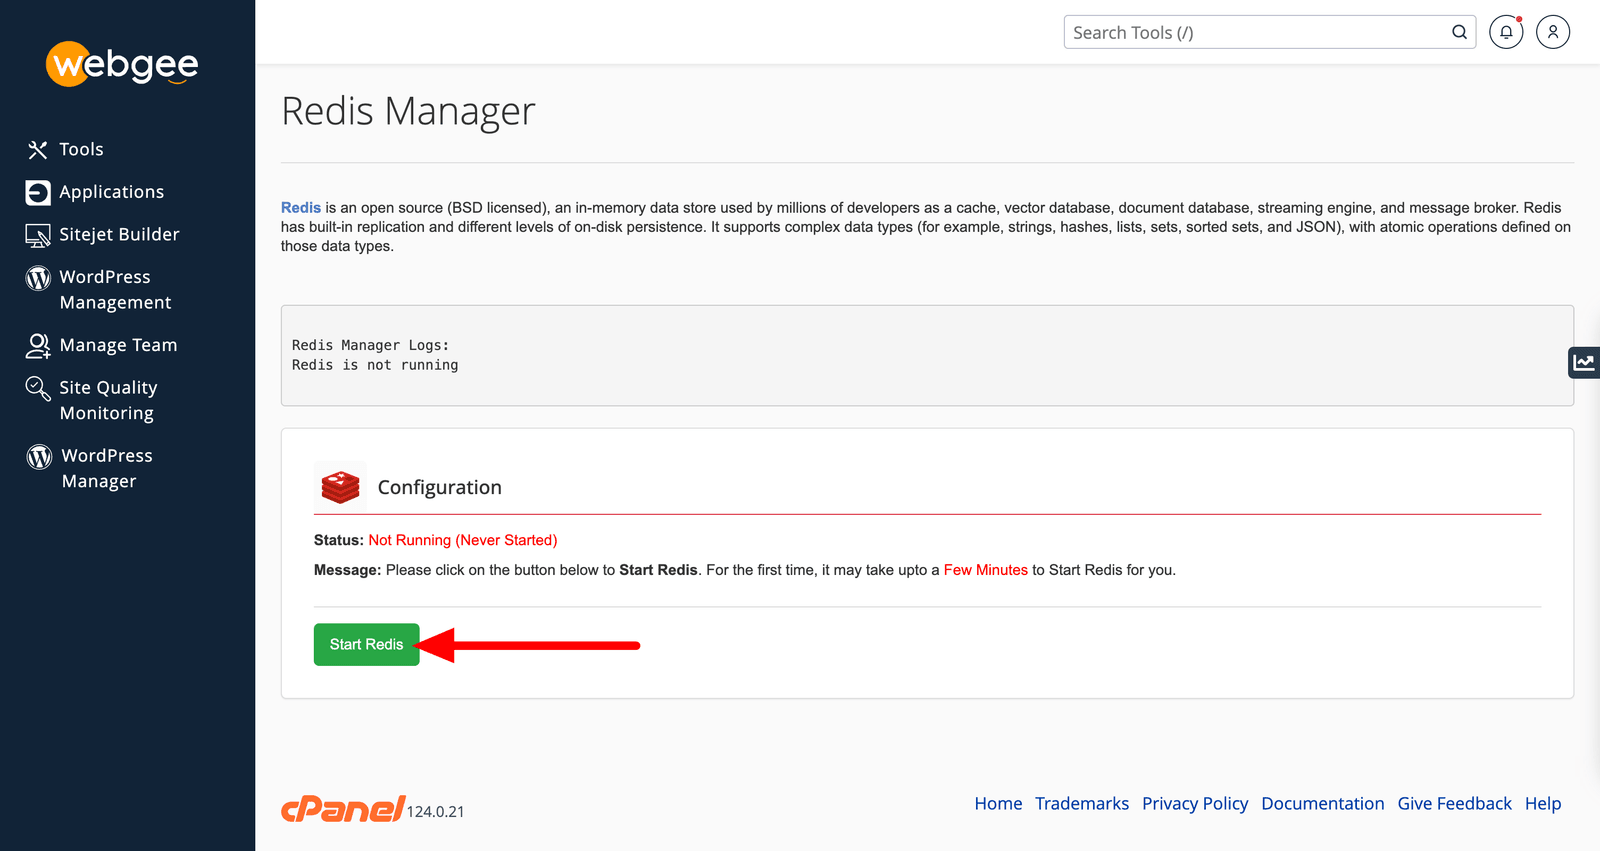
Select Enable Redis.
-
Note the port and password shown. You need both in step 3.
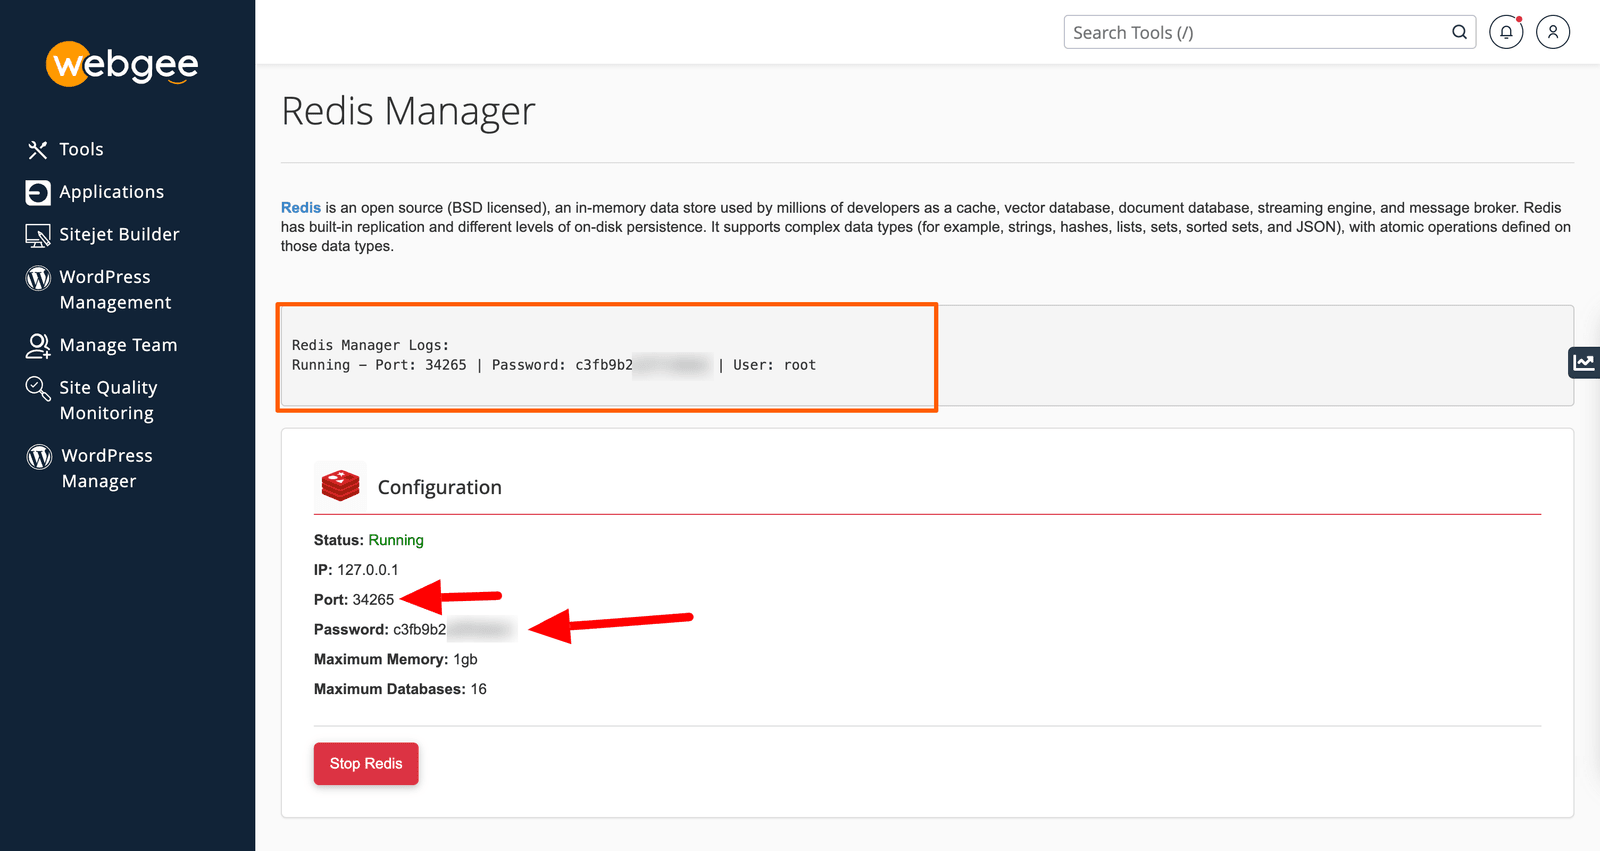
You can return to this page at any time to see these values again.
2. Enable the PHP extension
Redis is running, but PHP cannot talk to it until the extension is on.
-
In cPanel, open Select PHP Version.
-
Select Extensions.
-
Tick redis.
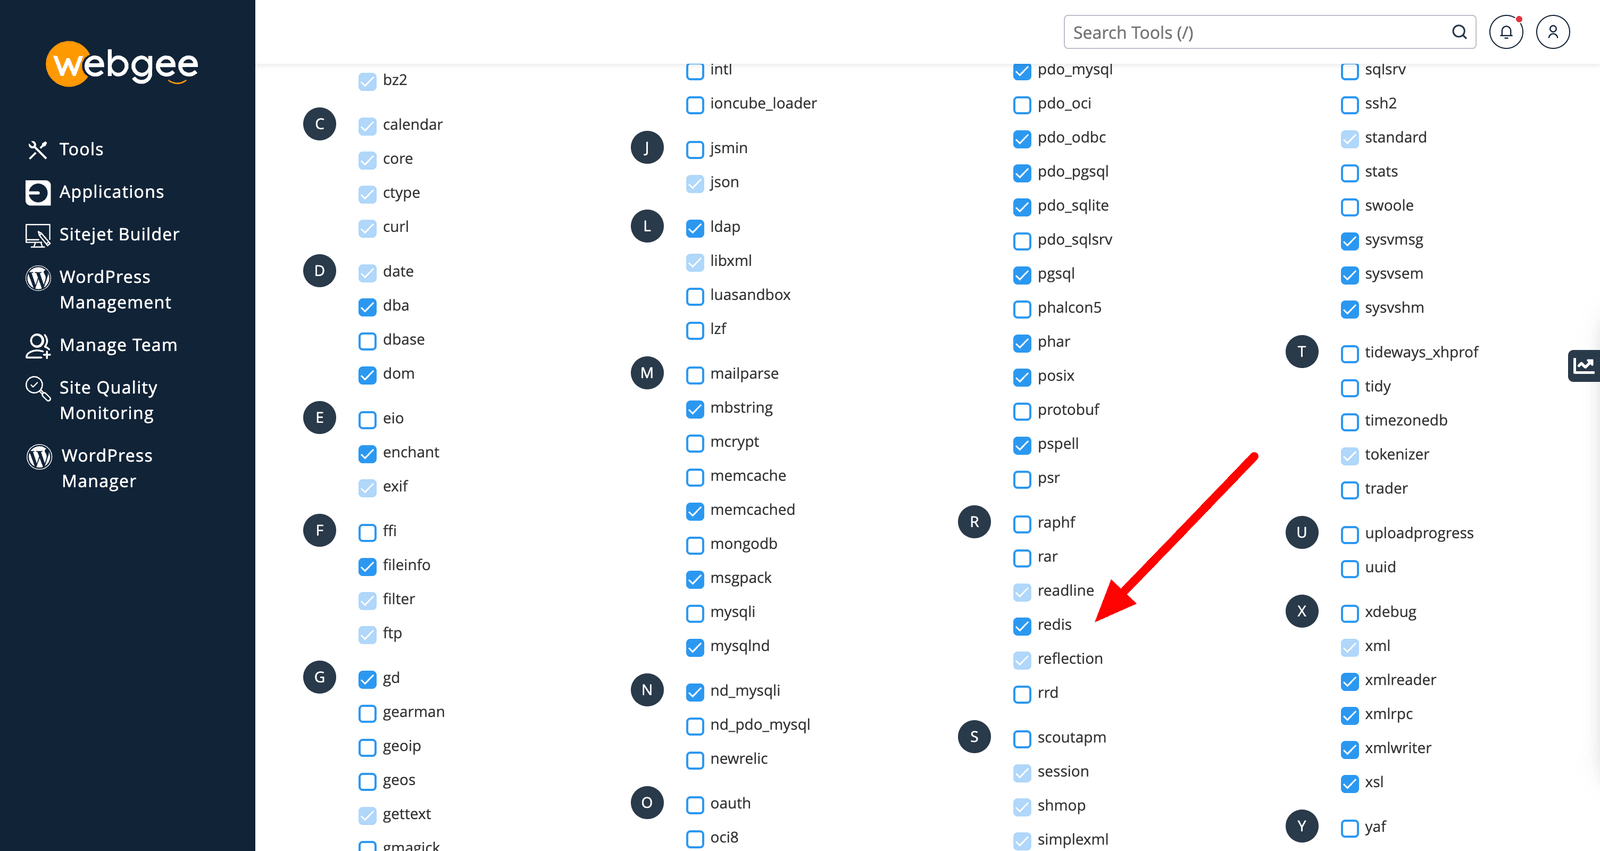
The change applies immediately.
3. Point LiteSpeed Cache at Redis
-
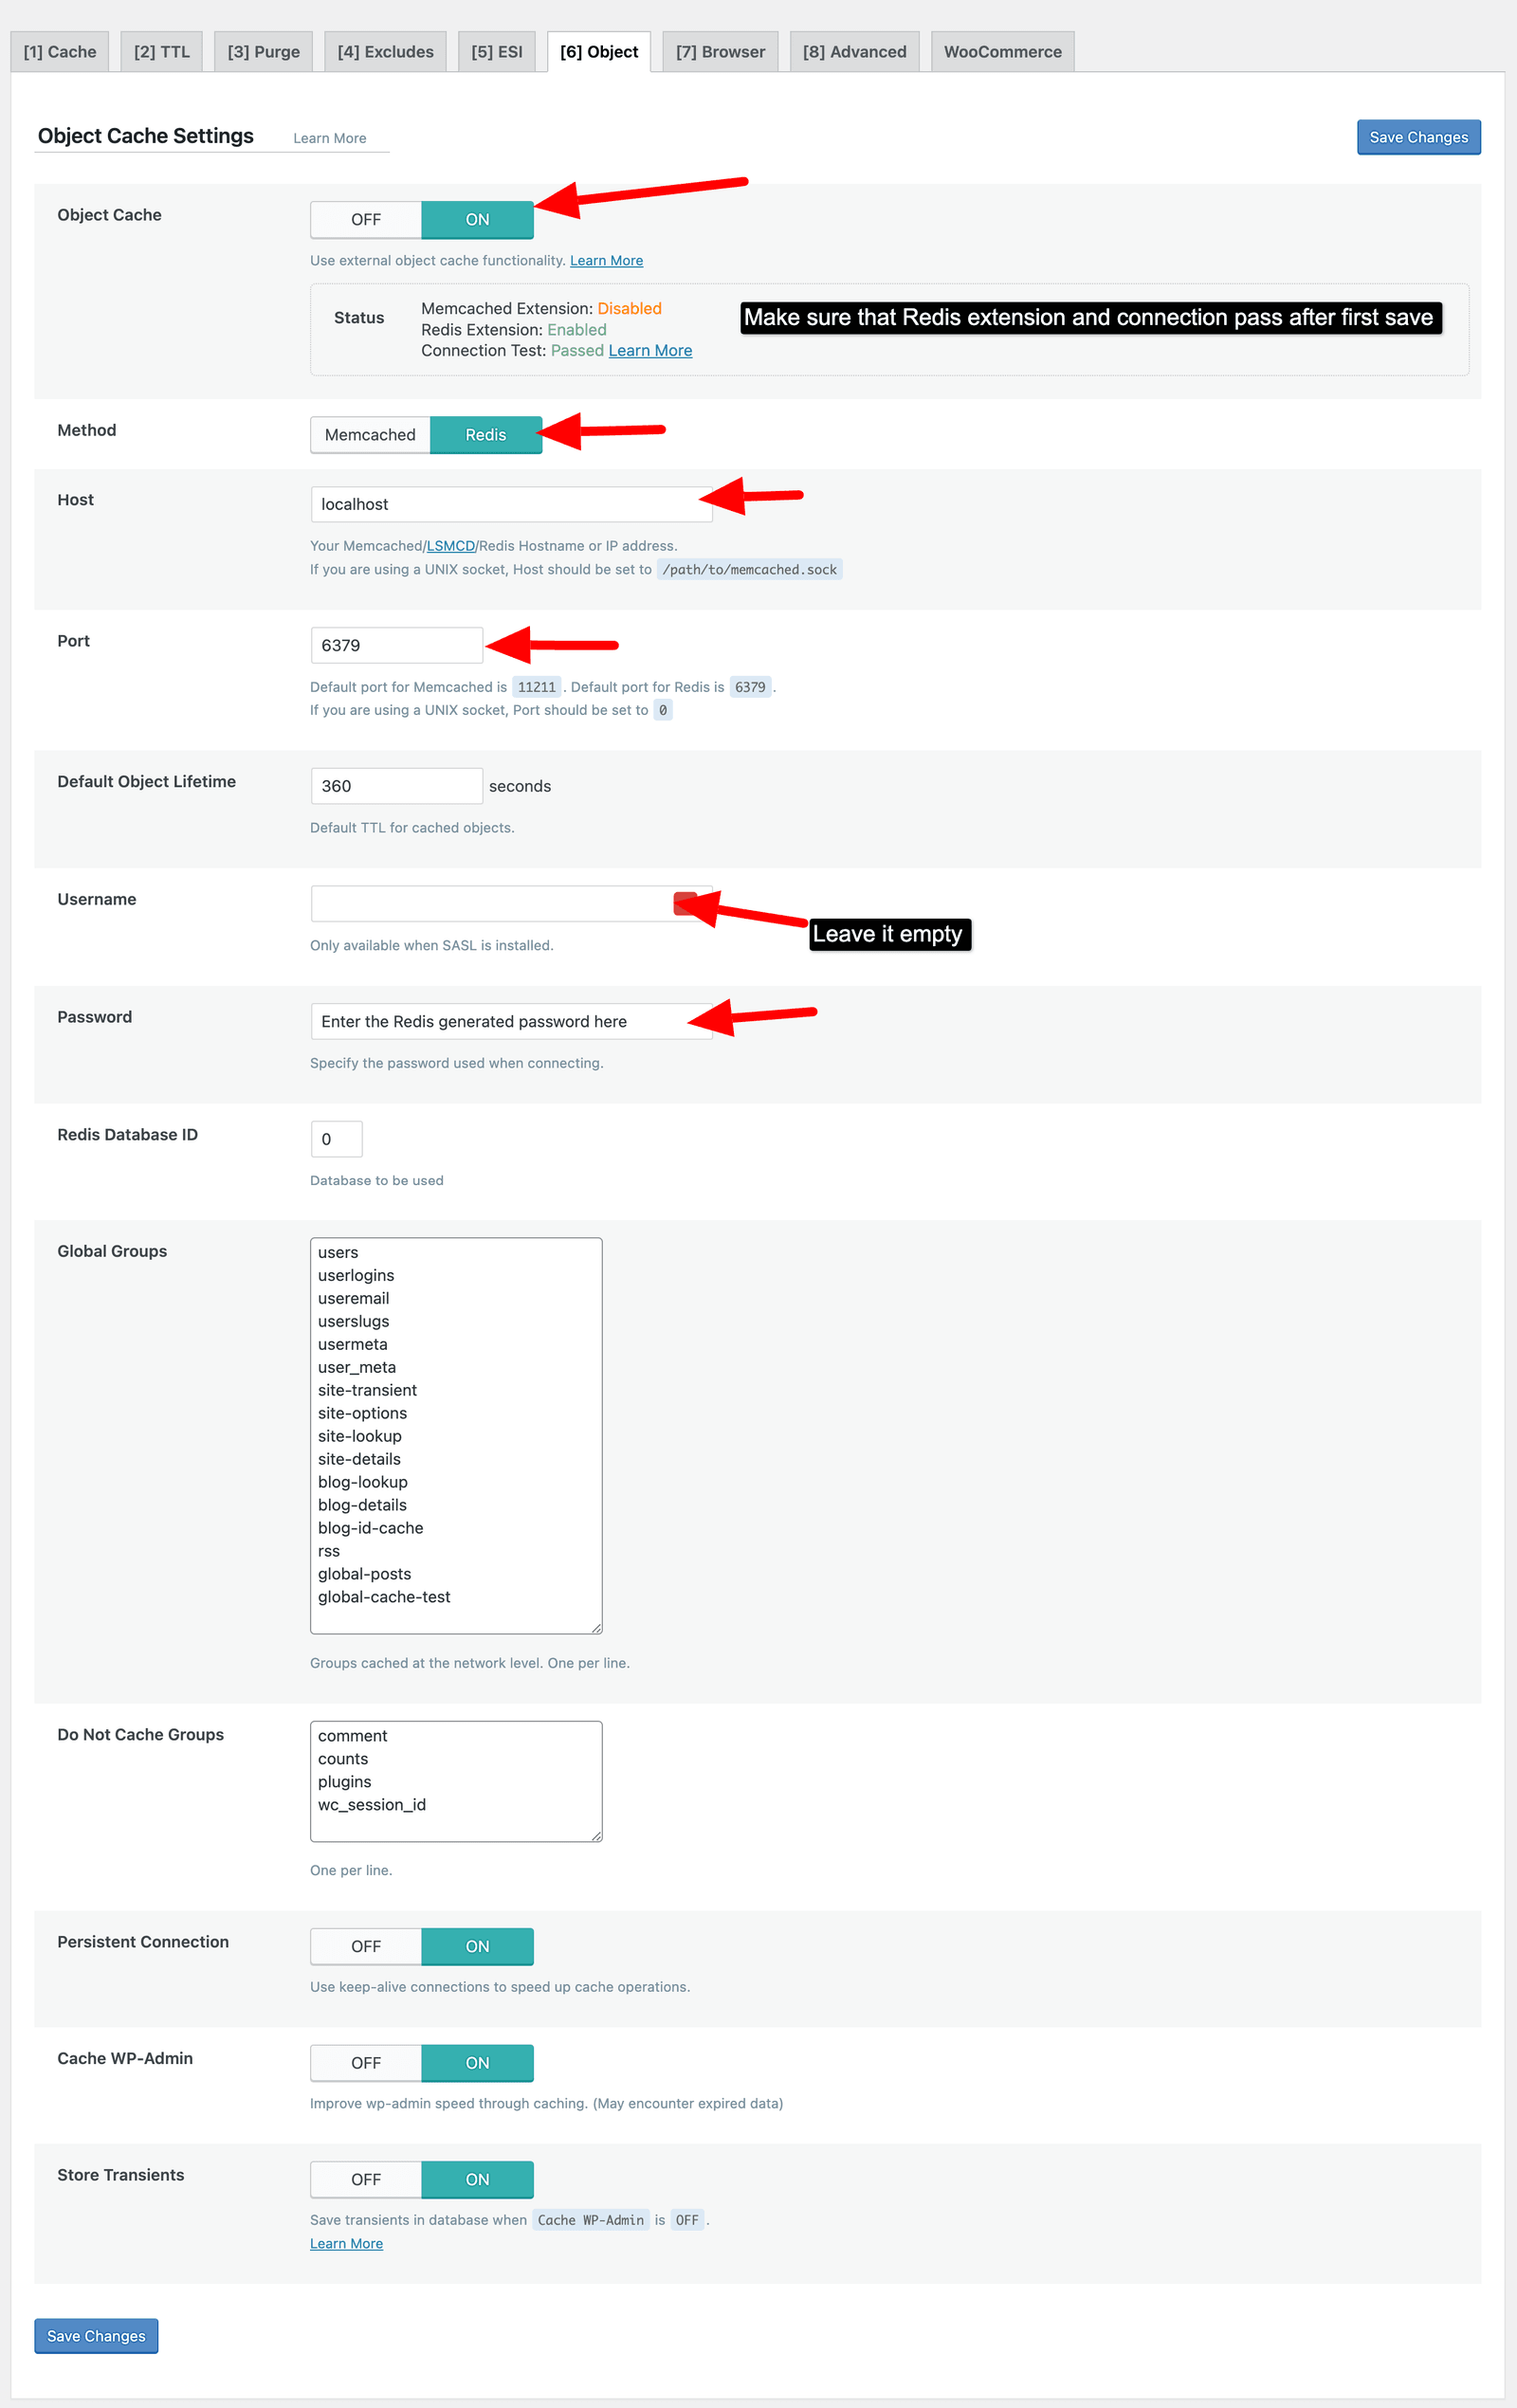
In WordPress, go to LiteSpeed Cache → Cache → Object.
-
Set the following:
Setting Value Object Cache OnMethod RedisHost 127.0.0.1Port the port from step 1 Username leave empty Password the password from step 1 -
Select Save.
Check it worked
On the same Cache → Object page, LiteSpeed shows a connection status. It should read Passed.
If it does not, work through these in order:
- Connection refused — Redis is not running. Re-check step 1.
- Class 'Redis' not found — the PHP extension is off. Re-check step 2.
- Authentication failed — the password is wrong. Copy it again from cPanel → Redis; it is regenerated when Redis is disabled and re-enabled.
If your site later shows an OOM error
Redis has a memory ceiling per account. When a site outgrows it you will see
OOM command not allowed when used memory > 'maxmemory'. See
Redis memory limits.