

Connect over SSH
Enable SSH on your cPanel account, connect from macOS, Linux or Windows, and set up key authentication instead of a password.
Open a command line on your hosting account over SSH, so you can run
wp-cli, composer, git and other tools directly on the server. Applies to
shared and reseller hosting where SSH is included, and to all VPS and dedicated
servers.
Before you begin
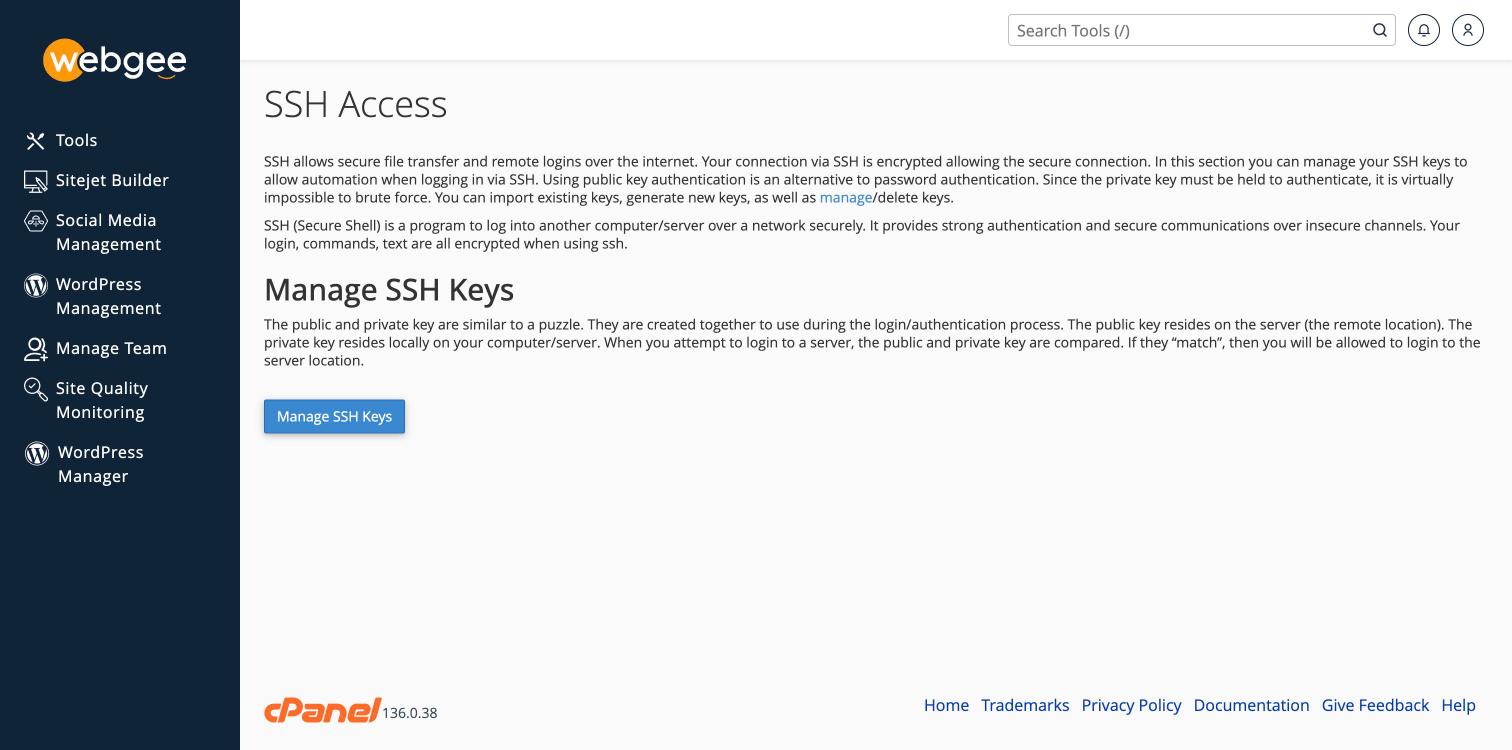
SSH is not enabled on every shared plan. Check cPanel → SSH Access; if it is missing, open a ticket from the client area and ask for SSH to be enabled on your account.
You will need:
- Your cPanel username and password.
- Your domain name or server hostname.
- The SSH port. WebGee servers use the standard port 22. If a connection is refused, confirm the port on the SSH Access page before assuming anything else is wrong.
Connect with a password
On macOS and Linux, use the built-in client:
ssh cpaneluser@example.com -p 22The first time you connect, you are asked to confirm the server's fingerprint —
type yes.
On Windows, the same command works in PowerShell and Windows Terminal. If you prefer a graphical client, see Connect with PuTTY.
Use a key instead of a password
Key authentication is both more convenient and far more secure — there is no password to guess, and the private key never leaves your machine.
Generate a key on your own machine
This is the better option: the private key is created locally and is never transmitted.
ssh-keygen -t ed25519 -C "you@example.com"Accept the default location and set a passphrase when prompted. This writes two
files: ~/.ssh/id_ed25519 (private — never share it) and
~/.ssh/id_ed25519.pub (public).
Then authorise the public key on your account:
-
Display the public key:
cat ~/.ssh/id_ed25519.pub -
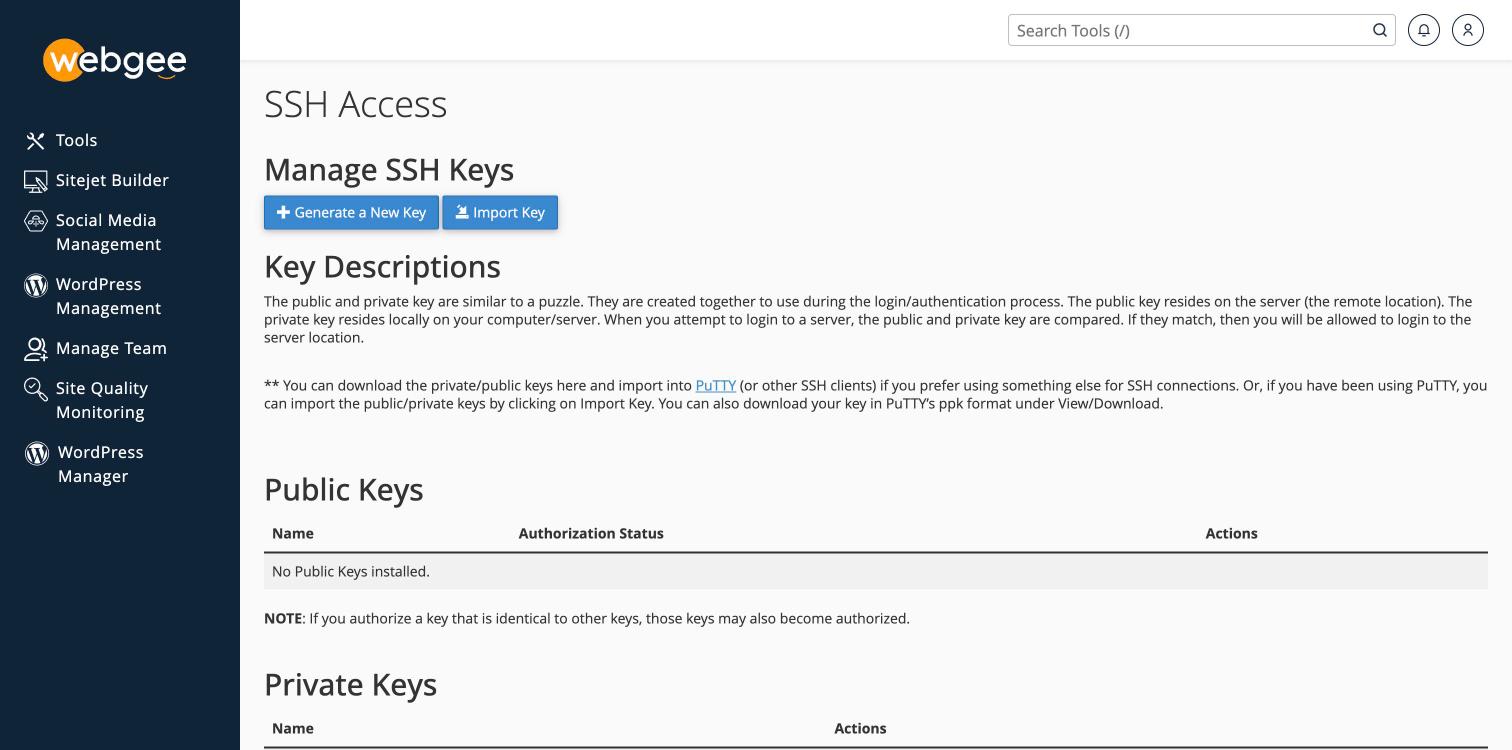
In cPanel, open SSH Access → Manage SSH Keys.
-
Select Import Key.
-
Leave the private key box empty, paste the public key into the public key box, and select Import.
-
Beside the imported key, select Manage, then Authorize.
A key is not usable until it is authorised. Importing alone does nothing — this is the step people miss.
Generate a key in cPanel instead
cPanel can generate the pair for you under SSH Access → Manage SSH Keys →
Generate a New Key. Choose ed25519, or RSA at 4096 bits if a tool you
use does not support ed25519. Authorise the key afterwards, then download the
private key and store it in ~/.ssh on your own machine.
This is more convenient but slightly weaker: the private key is generated on the server and has to travel to you.
Check it worked
ssh cpaneluser@example.com -p 22 "whoami && pwd"It should print your cPanel username and your home directory without asking for a password.
If the connection is refused
Connection refused— SSH is not enabled on the account, or an outbound firewall at your end is blocking port 22.Permission denied (publickey)— the key is imported but not authorised. Go back and authorise it.Permission denied (password)— SSH is not enabled on the account, or the password is wrong. Confirm the password by signing in to cPanel.- It hangs with no response — your network is blocking outbound SSH. Test
with
nc -vz example.com 22.
Related
Change your PHP version and settings
Switch PHP versions and adjust values like memory_limit from cPanel, or with a .user.ini file if your site runs on Bolt-Cache.
Serve Laravel from the public directory
Point your domain at Laravel's /public folder using .htaccess, so visitors reach example.com rather than example.com/public.